Edge crumbling: how to prevent it
Edge crumbling starts where pavement meets soil without support. How to build a shoulder, hold it with edging, and grade water away so the edge survives winter.
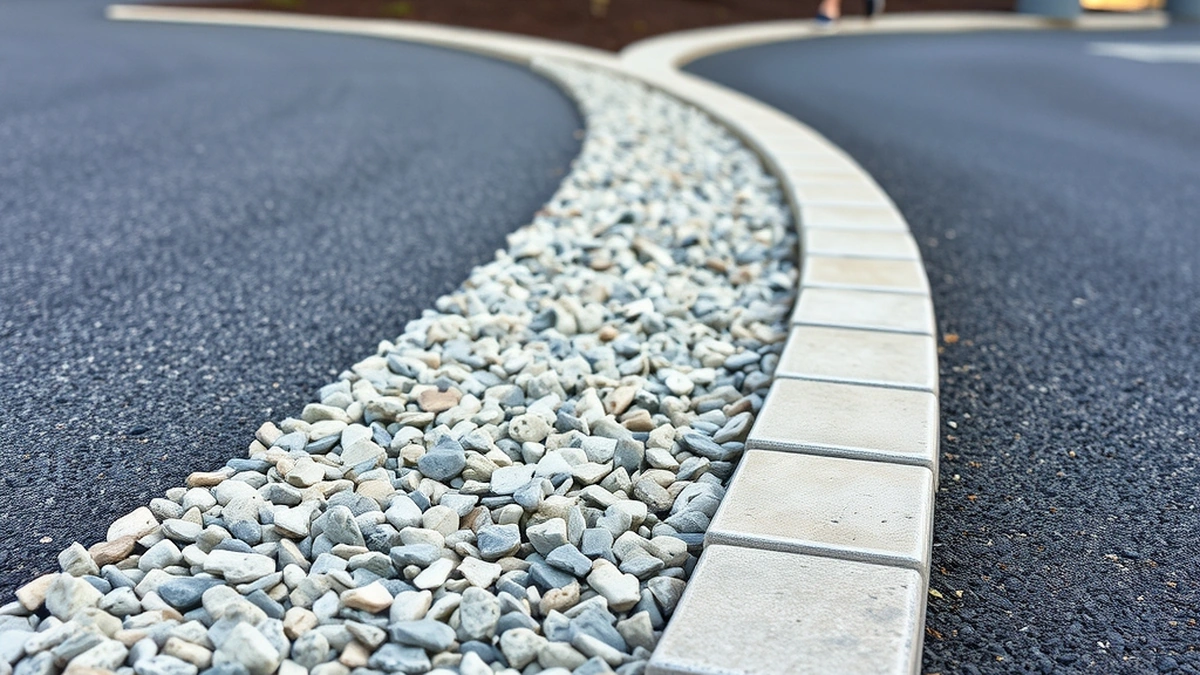
Prevent edge crumbling by supporting the pavement at its perimeter: keep a compacted shoulder level with the asphalt, hold it with edging or a curb, grade water away from the joint, and keep vehicle wheels on the pavement instead of the lip.
- Root cause
- Unsupported shoulder
- Shoulder level
- Level with asphalt
- Edging
- Holds shoulder in place
- Repair if it starts
- $100-$400 per section
- Sealcoat
- $0.15-$0.30 per sq ft
Some links on this page are affiliate links.If you buy through them we may earn a commission at no extra cost to you. We do not accept payment for rankings. Read the full disclosure.
Edge crumbling is preventable because it has one cause: the pavement at the perimeter has nothing holding it up. Build and maintain a compacted shoulder level with the asphalt, hold it with edging, and send water away from the joint, and the edge survives winters that would otherwise break it down.
The physics of a driveway edge
Asphalt carries load by spreading it sideways into the material beneath and beside it.
In the middle of the drive, that material is more pavement. At the edge, it is soil, gravel, or lawn, and if that transition is loose or missing, the edge is unsupported.
An unsupported edge flexes under traffic, cracks, and breaks away in pieces. Water accelerates it by softening the shoulder and running along the joint.
What good edge support looks like
| Element | Correct condition | Failure if wrong |
|---|---|---|
| Shoulder material | Compacted gravel or soil | Edge flexes and cracks |
| Shoulder level | Level or slightly below asphalt | Water runs onto pavement |
| Joint gap | None | Water enters under the edge |
| Edging | Present and intact | Shoulder washes out |
| Grade | Falls away from pavement | Water pools at the joint |
| Traffic | Wheels on pavement | Lip breaks away |
Six elements, and the failure column explains most of the edge damage you see on residential driveways.
Building the shoulder
The shoulder is a strip of compacted material beside the pavement, typically 6 to 12 inches wide for a residential drive.
It should be built from aggregate that compacts well, not from loose topsoil. Place it in shallow lifts and compact each one, working up to the level of the asphalt.
Do not build it above the pavement. Material that sits proud sheds soil and water onto the surface, and the joint becomes a trap rather than a seal.
If the existing shoulder has washed out, rebuild it rather than topping it up. A thin layer over a void looks right for a month and fails at the first heavy rain.
Holding it with edging
Edging keeps the shoulder where you put it.
Options include paver edging set in concrete, timber edging, steel edging, and a poured concrete curb. The choice is mostly about budget and appearance; all of them work if they are installed below the surface level and bedded properly.
The edging must sit slightly below the asphalt surface so it does not catch a tire. Edging that stands proud gets hit, moves, and lets the shoulder escape.
For a driveway with heavy turning traffic, a poured curb is the most durable option and the most expensive.
Grading water away
Water is what turns an unsupported edge into a crumbling one.
Three grading rules matter:
The lawn should fall away from the driveway, not toward it. A lawn that slopes in delivers water to the joint with every rain.
Downspouts should discharge well clear of the pavement, ideally onto a splash block and away down the slope.
The driveway surface itself should shed water to the street or a drain, not to the edge. Ponding at the edge is a sign the surface grade needs correction.
If water stands along the edge after rain, fix that before repairing the asphalt. Otherwise the repair is being installed in the same wet conditions that caused the failure.
The twice-yearly check and the limits
- Spring, after the thaw: walk the perimeter and look for gaps between the asphalt and the shoulder.
- Probe the shoulder with a boot; soft ground means water is present.
- Top up and compact any washed-out sections.
- Autumn, before the freeze: repeat, and clear leaves from the joint.
- Check that edging is intact and not standing proud.
The spring check matters most, because winter is when the damage happens and spring is when it is cheapest to fix.
What prevention cannot do.
Three limits are worth knowing.
It cannot compensate for a base that was never compacted. If the pavement itself is settling, the problem is under the driveway, not beside it.
It cannot fix a driveway that is too narrow for its traffic. If every vehicle puts a wheel on the edge, the edge will break regardless of how well it is supported.
It cannot replace a repair once the asphalt has broken away. Prevention protects sound pavement; a crumbling edge still needs cutting back and patching at $100 to $400 per section.
Our edge crumbling repair guide covers that work, and edge crumbling cost prices it by extent.
The cost of prevention versus repair
Shoulder top-up and compaction: a bag or two of aggregate and an hour of work, most years.
Edging: a one-off material cost that varies with type, installed once.
Downspout extension: a low-cost item that protects a large area of pavement.
Edge repair: $100 to $400 per section, and more if the base needs correction.
The prevention items are cheap, one-off, and reduce a recurring repair. That is the case for doing them before the edge fails rather than after.
Where to start
If the edge is currently sound, check the shoulder level and the grade, then fix whichever is wrong.
If the edge has started to crumble, repair the section and rebuild the shoulder at the same time, or the repair will not last.
If the whole edge has failed along the driveway, the repair decision changes. Our edge crumbling signs guide covers how to tell localised damage from a whole-edge failure, and driveway sealing maintenance covers the wider upkeep schedule that keeps an edge protected.
Frequently asked questions
How do I stop my driveway edge crumbling?
Support it. Keep a compacted shoulder of soil or gravel level with the asphalt, hold it with edging or a curb, and make sure water drains away from the joint rather than along it.
Does edging prevent edge crumbling?
It helps significantly by holding the shoulder material and stopping wheels running off the edge. It does not replace proper base compaction, so the shoulder still has to be built correctly.
Should the grass be level with the driveway?
Close to it. Turf that sits well below the asphalt leaves the edge exposed and unsupported; turf that sits above it sheds soil and water onto the pavement. Level or slightly below is right.
Why does the edge crumble more in winter?
Freeze-thaw. Water in the shoulder and at the joint expands when it freezes, prising the pavement edge away. An unsupported edge loses a little more each cycle.
Can sealing prevent edge crumbling?
No. Sealer protects the surface from oxidation, but it cannot provide support. A coat over an unsupported edge does not stop the pavement breaking away.
How often should I check the driveway edge?
Twice a year, in spring after the thaw and in autumn before the freeze. Look for gaps between the asphalt and the shoulder, crumbling, and water running along the joint.
Sources
Some links are affiliate links.If you buy through them we may earn a commission at no extra cost to you. We do not accept payment for rankings. Read the full disclosure.