Alligator cracking: warning signs to catch early
The early signs of alligator cracking: fine parallel cracks, a dry grey surface, and wheel-path patterns. What each stage means and when patching still works.
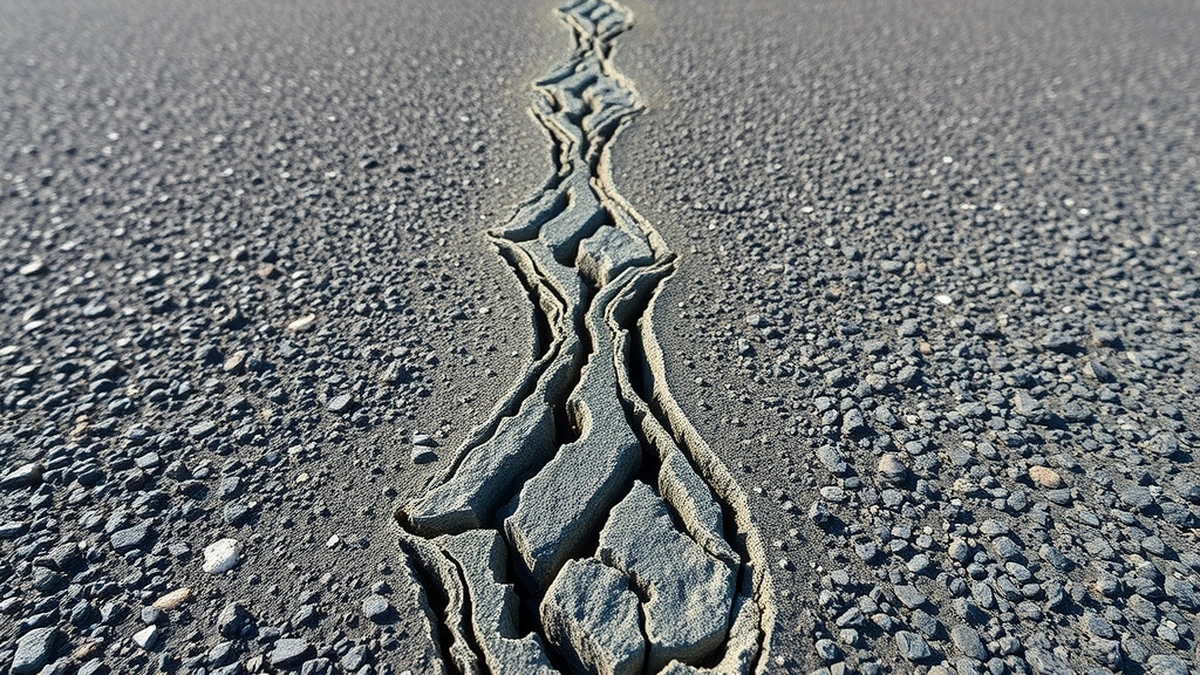
The warning signs of alligator cracking are fine parallel cracks that begin to connect, a dry grey surface in the wheel paths, and edges that crumble when probed. Catching it while the pattern is isolated means a patch at $3 to $7 per square foot instead of an overlay.
- First sign
- Fine parallel cracks
- Next sign
- Cracks begin to connect
- Late sign
- Polygons 1-6 in across
- Patch, if under 25%
- $3-$7 per sq ft
- Overlay, if over 25%
- $3-$7 per sq ft
Some links on this page are affiliate links.If you buy through them we may earn a commission at no extra cost to you. We do not accept payment for rankings. Read the full disclosure.
The first warning sign of alligator cracking is a set of short parallel cracks a few inches long, usually in a wheel path, that have not yet joined up. By the time the pattern looks like alligator skin, the surface has already failed. Catching it at the parallel stage is the difference between a patch at $3 to $7 per square foot and an overlay.
The four stages, in order
Alligator cracking develops in a predictable sequence. Knowing the stage tells you what the repair will cost.
Stage 1: fine parallel cracks, 1 to 3 inches long, spaced closely, with no connections.
Stage 2: the parallel cracks begin to link at their ends, forming short chains.
Stage 3: the links close into polygons, 2 to 6 inches across, and the surface between them starts to look dry.
Stage 4: the polygons loosen, edges spall, and pieces work free under traffic.
Stage 1 and 2 are patchable. Stage 3 is where the overlay decision usually starts. Stage 4 means material is being lost and the repair cannot wait.
What to look for
| Sign | Where to look | What it means |
|---|---|---|
| Parallel hairline cracks | Wheel paths, 1-3 in long | Early fatigue |
| Dry grey surface | Between the cracks | Binder oxidised |
| Cracks joining at ends | End of the wheel path | Pattern forming |
| Polygons 2-6 in | Centre of the affected area | Established failure |
| Loose aggregate | Under the polygons | Late stage |
| Edge crumbling nearby | Driveway perimeter | Base support lost |
The wheel path is the place to check first, because that is where load and deflection are highest. The second place is the edge, where water gets under the pavement.
How to inspect in ten minutes
- Walk the driveway after it has dried, so cracks show as dark lines.
- Look down the wheel paths from a low angle; raking light shows hairline cracks.
- Press a screwdriver into the surface between cracks; softness means the base is losing support.
- Pour a bucket of water on the affected area and watch where it goes.
- Mark the boundary of the pattern with chalk and measure it.
The chalk boundary is the number that decides the repair. Compare it with the total driveway area: under a quarter, patch; over a quarter, overlay.
What each stage costs to fix
At stage 1 or 2, a patch covering the affected strip at $5 per square foot is $5 × 50 = $250 for a 50 square foot area.
At stage 3, the affected area is often 100 to 200 square feet. A patch at $5 is $500 to $1,000, and an overlay on a 600 square foot driveway is $1,800 to $4,200.
At stage 4, patching is not practical across a wide area, and replacement at $8 to $15 per square foot becomes a real option: $4,800 to $9,000 on 600 square feet.
The cost curve is steep, which is why the early signs matter.
What early signs are not
Three lookalikes get misdiagnosed.
Block cracking. Cracks form large rectangles rather than small polygons, usually from binder ageing rather than load. The repair is similar but the cause is different.
Reflective cracking. Cracks in a new overlay following joints in the pavement below. Not alligator, and not a base failure in the same sense.
Surface checking. Very fine, shallow cracks from sun exposure, with no structural movement. Sealer can slow this; it cannot stop alligator cracking.
If the cracks connect into small polygons and the surface between them is dry and loose, it is alligator. If they run in lines or large rectangles, it is something else.
What to do at the first sign
Do not seal it. A coat at $0.15 to $0.30 per square foot over an emerging pattern looks uniform for a season and then re-cracks along the same lines, with failed film at every crack edge.
Do check the water. If downspouts discharge onto the area, or the surface ponds nearby, that is the accelerant. Correcting it slows the pattern more than any coating.
Do measure and record. A photo with a tape measure across the affected area gives you a baseline for next year, and it makes a contractor quote comparable.
Do get a patch quote while the area is small. Our alligator cracking repair guide covers what the work involves, and alligator cracking cost prices it by area.
The signs that mean it is already too late to patch
Four conditions point to overlay or replacement rather than patching.
The pattern covers more than a quarter of the driveway. Patching that many separate areas costs more than an overlay.
The affected areas are scattered rather than concentrated, so there is no single patch to cut.
Sections have settled, leaving a lip at the edge of the pattern.
Water stands in the depressions after rain and cannot be graded away.
In those cases the honest spend is an overlay at $3 to $7 per square foot or replacement at $8 to $15. Patching delays it by a season or two at best, and the money is gone.
Prevention after the repair
Once the failed area is repaired, the same conditions will start the pattern again unless they change.
Keep water moving away from the pavement, support the edges, and seal on a two-to-four-year cycle at $0.15 to $0.30 per square foot. Fill cracks at $2 to $5 per linear foot before they widen.
Those habits are covered in alligator cracking prevention. The inspection habit — ten minutes, twice a year, after rain — is what makes them effective, because it catches the next pattern at stage 1 instead of stage 3.
Frequently asked questions
What does the start of alligator cracking look like?
Short parallel cracks a few inches long, usually in the wheel paths, that have not yet connected into polygons. The surface above them often looks dry and grey.
How fast does alligator cracking spread?
It spreads with traffic and water. A small pattern can grow across a wheel path in two or three seasons, especially if water is standing nearby or the base is saturated.
Can you stop alligator cracking once it starts?
You can slow it by correcting drainage and cutting out the failed area. You cannot reverse it, because the base or binder has already lost capacity.
Is alligator cracking always a base problem?
No. It can also come from aged binder that has lost flexibility. In either case the surface pattern is a symptom, and surface coatings do not fix it.
How do I tell alligator cracking from normal cracks?
Normal cracks run in lines. Alligator cracks connect into a network of small polygons. If the cracks join up, it is the alligator pattern.
What should I do when I see the first signs?
Measure the affected area and check for water standing nearby. Under a quarter of the surface, patch. Above that, get an overlay quote before the pattern spreads further.
Sources
Some links are affiliate links.If you buy through them we may earn a commission at no extra cost to you. We do not accept payment for rankings. Read the full disclosure.